
Using a home diabetes monitoring machine, like a glucometer, is a vital aspect of managing diabetes. It empowers you to track your blood sugar levels, make informed decisions, and maintain better control over your health. In this comprehensive guide, we will throw some light on how a DIY glucometer works and how to effectively use a glucometer at home.

How Does DIY Glucometer Work?
A DIY (Do-It-Yourself) glucometer, also known as a homemade or open-source glucometer, is a device designed to measure blood glucose levels. These devices are often built by individuals or groups of researchers who are looking for alternative methods to monitor blood sugar levels, especially in places where traditional commercial glucometers might be less accessible or affordable. While not as widely recognized as commercially available glucometers, DIY glucometers can provide valuable insights for people with diabetes.
Here’s how a DIY glucometer typically works:
1. Blood Sample Collection:
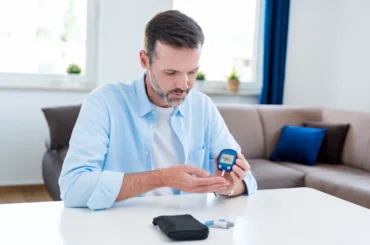
Similar to commercial glucometers, a DIY glucometer requires a blood sample to measure blood glucose levels. Users typically obtain this sample through a finger prick using a lancet.
2. Test Strip Interaction:
After obtaining the blood sample, the user places the sample on a test strip. These test strips are equipped with chemicals that react with glucose in the blood.
3. Electrochemical Reaction:
The test strip is then inserted into the DIY glucometer. The device uses an electrochemical process to measure the glucose level in the blood sample. This process involves a reaction between the glucose in the blood and the chemicals on the test strip. The extent of the reaction produces an electrical current that can be measured and converted into a blood glucose reading.
4. Calibration:
Calibration is crucial for accurate readings. Some DIY glucometers might require the user to calibrate the device using known glucose concentrations. This step helps the glucometer correlate the electrical current produced with the actual blood glucose level.
5. Display of Results:
Once the electrochemical reaction is complete and the measurement is calibrated, the DIY glucometer displays the blood glucose reading on its screen. This reading is typically shown in milligrams per deciliter (mg/dL) or millimoles per liter (mmol/L), depending on the unit used in your region.
It’s important to note that DIY glucometers, while innovative, might not have undergone the same rigorous testing and certification processes as commercial devices. Therefore, their accuracy and reliability can vary. Users should exercise caution and understand the limitations of these devices.
Quick Steps For How to use Glucometer at Home

1. Choose a Reliable Glucometer:
Begin by selecting a glucometer from a reputable brand. Research reviews and ask your healthcare provider for recommendations to ensure accuracy and reliability.
2. Prepare Your Hands:
Before testing, wash your hands with warm water and mild soap. Dry them thoroughly. Refrain from using alcohol-based sanitizers, as they can interfere with accurate readings.
3. Set Up a Clean Testing Area:
Create a well-lit and clean space for testing. Gather all necessary supplies, including the glucometer, fresh test strips, a lancing device, lancets, alcohol swabs, and a container for safe disposal of lancets.
4. Insert a New Lancet:
Ensure your lancing device contains a fresh lancet for each use. This guarantees a sharp and painless finger prick.
5. Use a Fresh Test Strip:
Never reuse test strips. Each time you test, use a new, unexpired strip from the container.
6. Choose a Pricking Site:
Opt for the sides of your fingertip rather than the tip itself. Rotate between different fingers to prevent soreness.
7. Follow the Instructions:
Familiarize yourself with the user manual of your glucometer. Adhere to the manufacturer’s guidelines for inserting the test strip, obtaining a blood sample, and reading the results.
8. Obtain Enough Blood:
Gently massage or “milk” your finger to stimulate blood flow before pricking. This ensures you get an adequate blood sample.
9. Apply Blood to the Strip:
Touch the edge of the test strip to the blood droplet. Allow the strip to fill completely, avoiding smearing or wiping the blood.
10. Wait for Results:
Patiently wait for the glucometer to display your blood sugar reading. The wait time varies depending on the model but usually takes only a few seconds.
11. Record Your Readings:
Maintain a diabetes logbook or use a dedicated mobile app to document your blood sugar readings. Include details about meals, exercise, and medication.
12. Calibrate When Needed:
Some glucometers require periodic calibration using a control solution. Follow the manufacturer’s instructions to calibrate accurately.
13. Maintain Hydration:
Staying hydrated helps blood flow, making it easier to obtain a blood sample. Dehydration can lead to discomfort during pricking and difficulty getting enough blood.
14. Proper Test Strip Storage:
Store your test strips in their original container, away from moisture and extreme temperatures. Using expired or improperly stored strips may result in inaccurate readings.
15. Regular Maintenance:
Keep your glucometer clean by wiping it with a soft, damp cloth. Regular maintenance ensures accurate results and extends the lifespan of your device.
16. Troubleshoot Errors:
If you encounter error messages, consult your user manual for troubleshooting steps. If problems persist, contact the manufacturer’s customer support.
17. Share Results with Your Healthcare Provider:
Regularly share your blood sugar log with your healthcare provider. They can analyze the data, provide insights, and suggest adjustments to your diabetes management plan.
FAQs about How to use Glucometer at home
Why is monitoring blood sugar important for people with diabetes?
Monitoring blood sugar levels is crucial for people with diabetes to manage their condition effectively. It helps you understand how your body responds to food, physical activity, and medications. Regular monitoring allows you to make informed decisions about your diet, exercise, and medication adjustments.
How often should I test my blood sugar?
The frequency of testing varies based on your type of diabetes, treatment plan, and healthcare provider’s recommendations. Some people test their blood sugar before meals, after meals, before bedtime, and during specific situations like exercise or illness. Your healthcare provider can guide you on the appropriate testing schedule.
How do I choose the right glucometer?
Choose a glucometer from a reputable brand. Consider factors like ease of use, size of the display, compatibility with your healthcare provider’s recommendations, and availability of test strips. Your healthcare provider can offer guidance on selecting the right glucometer for your needs.
How long does it take to get the results?
Most glucometers provide results within a few seconds to a minute. The exact time can vary depending on the model.
What should I do if my blood sugar levels are too high or too low?
If your blood sugar levels are consistently outside of your target range, follow your healthcare provider’s guidance. High blood sugar might require adjustments in medication, diet, or exercise. Low blood sugar might require consuming a source of glucose.
How do I interpret the blood sugar readings?
Work closely with your healthcare provider to interpret your blood sugar readings. They will help you understand what your target range should be and guide you in making appropriate adjustments to your diabetes management plan.
How should I keep track of my readings?
You can keep a diabetes logbook or use a mobile app to record your blood sugar readings, along with notes about meals, exercise, and medication. Sharing this information with your healthcare provider during appointments can help them provide better guidance.
Can the glucometer readings be affected by factors other than blood sugar levels?
Yes, factors like temperature, humidity, expired test strips, and improper calibration can affect glucometer readings. It’s important to follow proper testing procedures and use the device as instructed.